A gamepad tester shows exactly what your controller sends to your device, one input at a time. In a few minutes it tells you whether a problem is in the pad or in a game or setting.
This guide walks through a full check with the free gamepad tester on GamepadTesters.net. It works for Xbox, PlayStation, Switch and most PC controllers.
What a Gamepad Tester Does
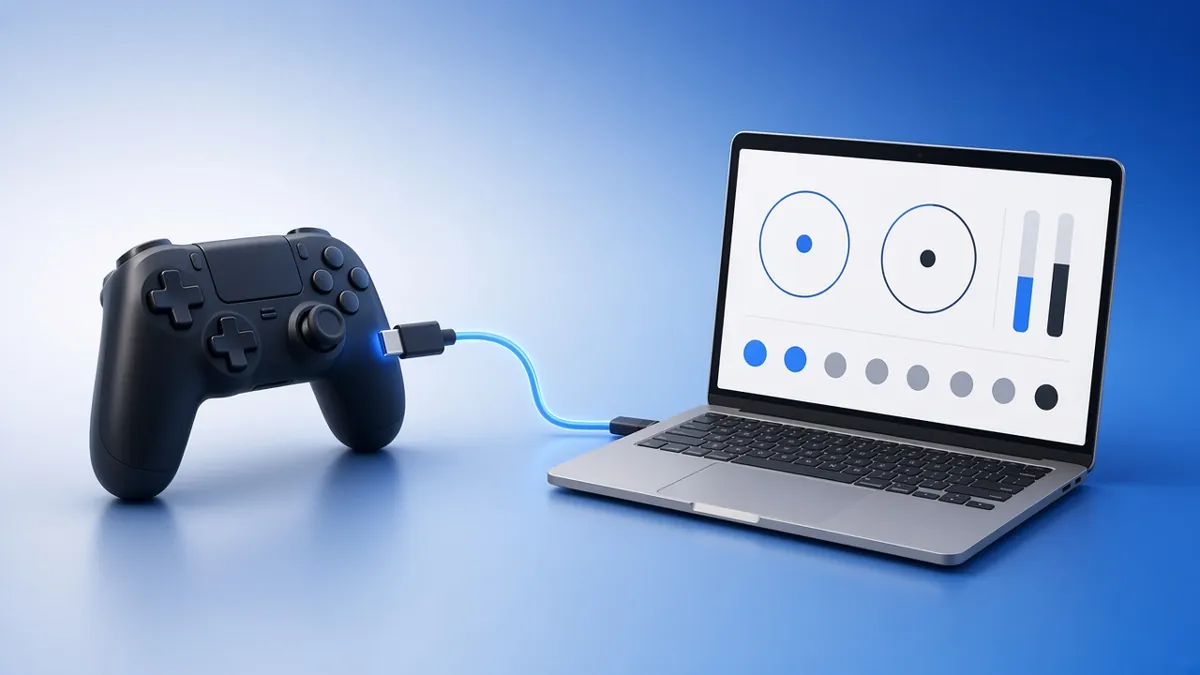
A gamepad tester is a page that displays, in real time, every value your controller reports: which buttons are down, where each stick is, how far each trigger is pressed and how often new reports arrive.
That makes it the quickest way to answer one question: is the controller faulty, or is something else wrong? If a button lights up in the tester but does nothing in a game, the controller is fine and the problem is the game's settings, Steam Input or a mapping tool. If the button never lights up, the fault is in the pad, the cable or the connection.
Before You Start
A few minutes of preparation gives cleaner results:
- Use a recent browser. Chrome, Edge, Firefox and Safari all work. Chrome and Edge also unlock PlayStation extras such as the touchpad and light bar.
- Close other controller software. Steam, DS4Windows, reWASD and similar tools can remap or hide inputs. Close them for a raw reading.
- Keep the page in focus. Browsers pause controller input for background tabs, so keep the tester tab visible while you test.
Step 1: Connect Your Controller
You can connect with a cable or wirelessly. For the first test, a USB cable is best because it removes battery and wireless issues from the picture.
- USB: plug the controller in with a data cable. Some cheap cables only carry power.
- Bluetooth: put the controller in pairing mode and pair it in your system's Bluetooth settings first. On a DualSense or DualShock 4, hold Create/Share and PS until the light flashes. On an Xbox Wireless Controller, hold the pair button on top until the Xbox logo flashes quickly.
If you need step-by-step pairing help, see our guides for Xbox controllers, PS5 controllers and the Switch Pro Controller.
Step 2: Open the Tester and Press Any Button
Open gamepadtesters.net. The status bar will say it is waiting for a controller. This is normal: for privacy, browsers only reveal a controller to a page after you press a button on it.
Press any face button, such as A or ✕. The status should change to show the controller's name, for example "Sony DualSense connected", and the drawing will switch to the matching layout.
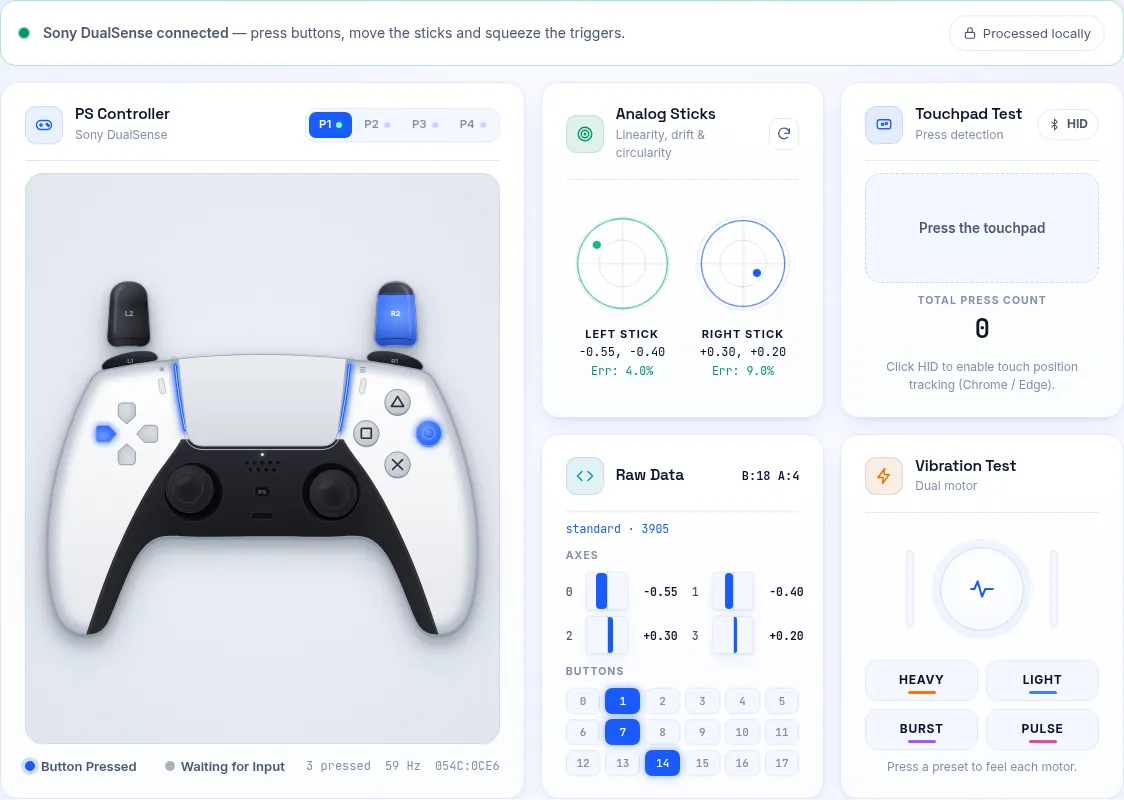
If nothing appears after a press, jump to common problems below or read our controller not detected guide.
Step 3: Check Every Button
Press each button one at a time and watch it light up in blue on the drawing and in the raw data grid.:
- Face buttons (A, B, X, Y or ✕, ○, □, △).
- All four D-pad directions, plus the diagonals.
- Bumpers (LB/RB or L1/R1).
- Menu, View, Share, Create, Options and the Home or PS button.
- Stick clicks (L3 and R3), by pressing straight down on each stick.
Each press should light up once and go dark as soon as you let go. Then press each one ten times quickly: missed presses point to a worn contact, doubled ones to switch chatter. If you need a timestamped log of every press, use the button mapping test.
Step 4: Test the Triggers
Most modern controllers have analog triggers that report a value from 0.00 (released) to 1.00 (fully pressed). Squeeze each trigger slowly over about two seconds and watch its bar fill.
A healthy trigger starts moving as soon as you touch it, climbs smoothly without jumps, reaches a full 1.00 at the bottom and drops back to 0.00 when released.
Step 5: Check the Analog Sticks and Drift
The two circular plots show where each stick is, with X and Y values from −1 to +1. First, let go of both sticks and look at the resting values. They will rarely be exactly zero, and that is fine. Resting values under about 0.03 are normal noise; above 0.08 they can move a camera in games with small deadzones.
Next, roll each stick slowly around its outer edge a few times. The dot should trace a smooth, round path and reach the edge of the circle in every direction.
For an exact measurement, open the stick drift test, place the controller flat on a table and run the five-second rest test. It records the offset and noise for each stick and gives a clear verdict. Our article on how much stick drift is normal explains the numbers in detail.
Step 6: Measure Deadzone and Circularity
Once you know how much each stick drifts at rest, you can choose a deadzone that hides it without losing precision. The deadzone test shows the raw stick next to what a game would receive after a given deadzone, and suggests the smallest setting that keeps your stick still.
The circularity test checks the outer range. It compares your stick's outline with a perfect circle; a large error or a flat side can mean wear, debris or bad calibration.
Step 7: Test Vibration
Most controllers have two rumble motors: a heavy, low-frequency motor on one side and a light, high-frequency motor on the other. In the vibration panel, press the Heavy and Light presets separately and feel each grip.
Both motors should start instantly and run smoothly. A rattle, a buzz that stays weak or a motor that does not start at all points to a hardware fault. If nothing happens, try Chrome or Edge, or the vibration test for more options.
Step 8: Check Polling Rate and Latency
The polling rate is how often the controller sends a new report, measured in hertz (Hz). The small Hz figure under the controller drawing gives a live estimate while you move the sticks. For a proper reading, open the polling rate test and spin a stick in circles for a few seconds.
Typical results are around 60 to 250 Hz over Bluetooth and 125 to 1000 Hz over USB, depending on the controller. Treat the browser figure as a lower bound. To check responsiveness end to end, run the input latency test and trust the median of several rounds. Our polling rate explainer covers what these numbers mean for games.
Testing a Controller on a Phone
You can run the same checks on Android or iPhone. Pair the controller in the phone's Bluetooth settings (or use a USB-C OTG adapter on Android), open gamepadtesters.net in Chrome or Safari and press a button to wake it.
This is handy when buying a used controller. See our guide to testing a controller on your phone and our checklist of what to test before buying a used controller.
How to Read Your Results
Use this table as a quick summary after a full test:
| What you see | What it usually means |
|---|---|
| Button lights here but not in a game | Controller is fine; check game bindings, Steam Input or mapping tools |
| Button sometimes fails to light | Worn or dirty contact; cleaning may help |
| Button lights without being pressed | Sticky residue, a short or a software conflict |
| Stick rests above 0.08 | Noticeable drift; raise the deadzone, clean or repair |
| Trigger never reaches 1.00 | Worn sensor, debris or a trigger stop enabled |
| Low or very uneven Hz | Weak wireless link; test again over USB |
Save a screenshot of your numbers so you can compare after cleaning or a repair.
Common Problems and Fixes
- Controller not detected. Press a button after the page has loaded, try another USB cable or port, and make sure the tab is in focus. Close Steam or DS4Windows.
- Wrong button names. Generic and some third-party pads use a raw layout, so a button may light up in an unexpected place. Switch 8BitDo and similar pads to X-input mode on Windows for the standard layout.
- Inputs drop out over Bluetooth. Move closer to the receiver and charge the pad. Our guide to wired vs Bluetooth vs 2.4 GHz explains the trade-offs.
- Buttons pressing themselves. See why a controller presses buttons by itself for causes and fixes.
- Works here but not in Steam games. The controller is fine; check the Steam Input settings. Our Steam troubleshooting guide covers this.
- Clear stick drift. Follow our stick drift repair guide, starting with a deadzone change and cleaning.
Frequently Asked Questions
Is an online gamepad tester safe to use?
Yes. The tester only reads input through your browser and processes it on your device. It does not install anything, and no input data is uploaded.
Do I need to install drivers?
Usually not. Modern systems recognise most controllers. Older pads, such as a DualShock 3, may need a driver or an adapter.
Why does the tester say "Press any button to connect"?
Browsers hide controllers from web pages until you press a button, to protect your privacy. Press any button after the page has loaded and the controller will appear.
Can I test two controllers at once?
Yes. Connect each controller and press a button on each one. The tester supports up to four at once, shown as P1 to P4.
How often should I test my controller?
Test it when something feels wrong, after a repair and when buying a used one. A monthly check shows whether stick drift is getting worse.